Images we are presented with may not be perfect or ideal all the time. Fortunately for us there are several methods too correct and fix images to make them clear and usable. In this lab I will be focusing on techniques such as creating a subset, haze reduction and image fusion.
Methods
Image Subsetting
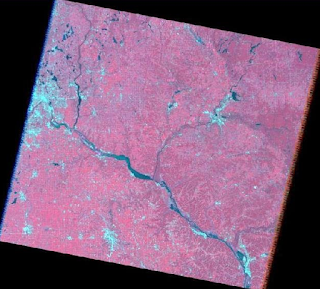
Creating a subset is pretty straightforward and easy to do with the tool Erdas Imagine provides. Like with most things there are many methods of accomplishing this but the easiest method is to open up you image and insert an inquire box. Place the box over the area you want to focus and from there click "create subset" from the above menu. From here save the subset under any name you want and you now have your subset or area of interest.
 |
| Original Satellite Image |
 |
Subset from Original Image
|
Image Fusion
The main reason you would want to use image fusion is for enhancing the quality of an image by combining it with another image. This is referred to as pan sharpening. To achieve higher quality means taking a reflective and panchromatic and fusing them together thus creating a pan sharpened image. In this case the reflective image has a spatial resolution of 30m and the panchromatic is 15m. When combining the two the image takes on the smaller pixel size, showing more detail. At full extent you may not see a difference in image quality unless you zoom in. The image quality does not get distorted as soon, showing greater detail.
 |
| Pan Sharpened Image |
Unfortunately haze is a factor we have to contribute while dealing with imagery. Fortunately, there are ways of reducing the significance haze has on an image. The more haze an image has the harder it is to interpret accurately and efficiently. ERDAS has a tool specifically made for reducing haze in an image and it works surprisingly well.
 |
| Image featuring haze in the southern most part |
 |
| Image after haze reduction - notice the slight change in color and improvement |
Sometimes when interpreting an image you may come across something you simply cannot decipher with the given image. Syncing your image up with Google Earth may assist you because Google Earth supplies us with very high quality images in true color. This means you are able to zoom in very far without distortion and can use Google Earth as a reference point and decipher the image you have using clues from the usually up to date Google Earth imagery.
 |
| Erdas Image and Google Earth Synced |
Resampling
Resample is used in instances where you want to increase or decrease pixel size of an image. This is particularly important when needing to interpret images. When increasing the pixel size it is referred to as resampling down while decreasing the pixel size is resampling up. With your image in the viewer go to spatial options and from there you can use the tool to adjust the pixel size by simply typing in the new desired dimensions.
 |
| This image has been resampled from 30mX30m to 20mX20m |
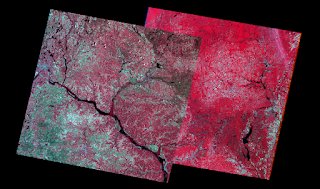
Mosaicking is a needed tool when your study area is larger than a given satellite image or split between two. Erdas has two forms of mosaicking, Mosaic Express which is very fast and easy and Mosaic Pro which creates more detailed, seamless mosaics but takes a little longer and is not as user friendly. With Mosaic Express you can tell there is more than one image being used based on color alone. The images do not blend well together although lined up correctly. Mosaic Pro, blends the colors and makes for a seamless mosaic of two images.
 |
| Mosaic Express Image |
 |
| Mosaic Pro Image |
Binary Change Detection / Image Differencing
Image differencing is simply comparing two images and finding the differences between the two images. In our case we looked at images of the same location 20 years apart. In Erdas there is a model builder that you can create a model to achieve certain goals. In this case I created a model comparing the two images specifically looking for loss of brightness in pixels. I also created a model that looked for pixels that did not change between the two images. Once combining those two files and putting them in to ArcGIS you can create a map showing changes between the two pictures.
Results
When working with images you often come across what some may consider problems or issues but with programs such as Erdas and the tools they have, working on these problems and fixing them is relatively easy as you can see from all the examples above.
Cyril Wilson - UWEC - Fall 2015
ERDAS Image
Google Earth
ArcGIS